Key takeaways
- Sanding creates a significant amount of fine dust that settles on the floor.
- Proper cleaning directly affects how well your floor finish bonds.
- Always begin with dry cleaning methods before using moisture.
- Microfiber cloths, tack cloths, and a vacuum cleaner are essential.
- The floor must be completely dry before applying any varnish or oil.
Why cleaning after sanding matters more than it seems
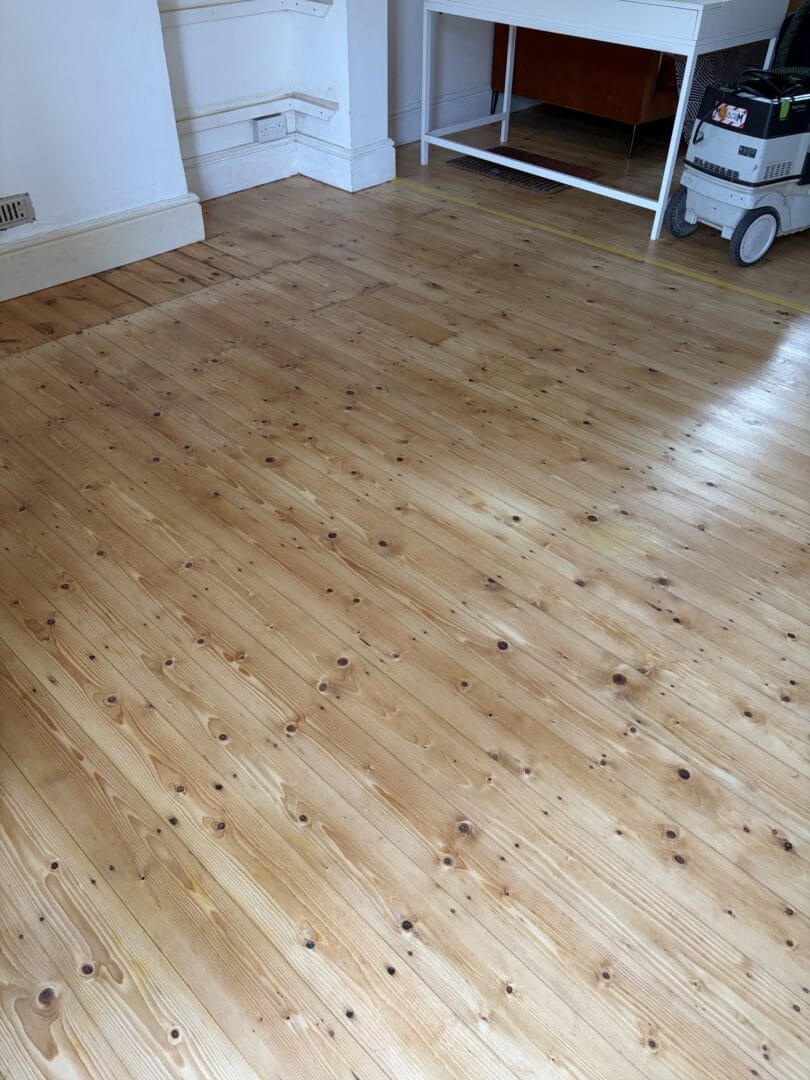
Once a wood floor has been sanded, it is exposed as bare wood. That shift matters. The surface is now open, absorbent, and far more sensitive to anything left behind.
This is where uncertainty creeps in. The floor can look clean, yet dust after sanding is still sitting in the grain, along edges, and between boards.
That remaining dust causes problems. It can stop stain absorbing evenly, leave a gritty texture underfoot, or create bubbles and imperfections in the final finish.
In real-world work, this is one of the most common reasons a floor does not turn out as expected. The sanding may be done well, but if the cleaning process is rushed, the finish suffers.
If you have recently had wood floor sanding carried out, this stage is what protects the result and allows the natural beauty of the wood to come through properly.
With the right floor care, hardwood floors can last 15 to 20 years or more. Cleaning properly after sanding is a big part of that.
What tools do you need to clean dust after sanding floors?
Before starting the cleaning process, it helps to have everything ready, so you are not stepping back into areas you have already cleaned.
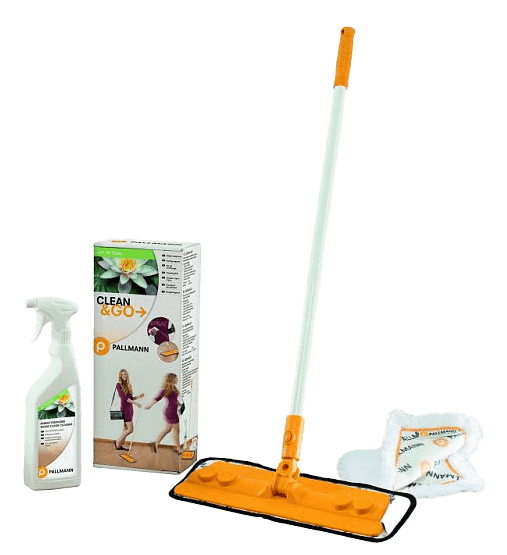
You will need a vacuum cleaner with a soft brush attachment, ideally a HEPA vacuum or shop vac. Microfiber cloths or a microfiber mop are essential for lifting fine dust. Tack cloths help remove the last layer of dust particles that are hard to see.
A pH-neutral floor cleaner can be used when damp mopping, along with a bucket and a lightly damp mop head. Wearing a dust mask is also sensible, as floor sanding creates a lot of dust that lingers in the air.
This is the same careful approach used in professional hard floor cleaning and care to ensure no residue interferes with the final finish.
Step 1: Let the dust settle properly
After sanding, there is always a significant amount of airborne dust. Starting too soon often makes things worse rather than better.
Allow several hours for the dust to settle across the entire floor and surrounding surfaces. Opening windows can help, but avoid creating strong airflow that keeps dust moving.
This step creates a calmer starting point and prevents recontamination during cleaning.
Step 2: Vacuum the floor thoroughly
Begin by vacuuming the floor surface using a soft brush attachment. Avoid vacuums with beater bars, as they can scratch a freshly sanded hardwood floor.
Work slowly and methodically across the entire floor. Pay close attention to edges, corners, and between floorboards where dust from sanding gathers most.
Do not forget baseboards and nearby surfaces. Dust settles there, too and can fall back onto the floor later.
Vacuuming removes the bulk of the dust, but not all of it.
Step 3: Use microfiber or tack cloths to remove fine dust
Even after vacuuming, a layer of fine dust will remain. This is where microfiber cloths and tack cloths make the difference.
Wipe the floor using a microfiber cloth, following the direction of the wood grain. This helps lift dust rather than pushing it deeper into the surface.
For the final passes, use tack cloths to pick up ultra-fine particles. Professionals often repeat this stage more than once, as remaining dust is what affects the final finish most.
At this point, the floor should start to feel smooth and clean under your hand.
Step 4: Lightly damp mop the floor surface
Once dry cleaning is complete, a lightly damp mop can be used. The key here is control.
Use a microfiber mop with a slightly damp mop head, not a wet cloth. Excess water can damage bare wood and lead to swelling or warping.
A pH-neutral cleaning solution or a very mild mix of water and dish soap can be used if needed. Avoid harsh chemicals such as bleach or ammonia.
Work in sections across the entire floor, always following the grain. The goal is a thorough clean without leaving moisture behind.
Step 5: Dry the floor completely
After damp mopping, the floor must be fully dry before any finish is applied.
You can allow the floor to air dry or use dry microfiber cloths to speed up the process. Good airflow helps, but keep the environment as dust-free as possible.
This step gives confidence that the surface is ready for the next stage.
Step 6: Check for remaining dust
Before applying any floor finish, take time to inspect the surface carefully.
Use a low-angle light or natural daylight to reveal any remaining dust particles. Run your hand across the floor surface to check for smoothness.
If anything feels uneven or looks dusty, repeat the cleaning process. It is far easier to correct now than after the finish is applied.
Common mistakes when cleaning dust after sanding
Cleaning too early, before dust has settled, often spreads dust rather than removing it. Using too much water is another common issue, as raw wood absorbs moisture quickly.
Skipping the fine dust stage is one of the biggest mistakes. Vacuuming alone is not enough for proper hardwood floor cleaning.
Applying a finish before the floor is completely clean and dry can lead to visible defects and a poor final finish.
These small missteps are often what separate an average result from a professional one.
What cleaning solutions are best for wooden floors?
When choosing a cleaning solution, simple is usually better.
A pH-neutral floor cleaner is the safest option for most hardwood surfaces. It cleans without leaving residue that could interfere with varnish or oil.
DIY solutions, such as mild soap mixes, can work but require care. Too much product can leave a film on the floor.
Commercial products are more consistent and are often the better choice when preparing floors after sanding, especially if you plan to apply a specific type of finish.
When should you clean floors after sanding?
Initial cleaning can begin once dust has settled, often on the same day.
A more thorough clean usually takes place within 24 to 48 hours, depending on airflow and humidity.
There is also a difference between cleaning before finishing and cleaning between coats. Light sanding and cleaning may be needed again before applying the final finish.
Timing plays a key role in keeping the process dust-free.
Pro tips for a spotless finish
Cleaning the floor alone is not always enough. Dust settles on walls, ceilings, and fixtures, and can fall back onto the floor if left untouched.
Using a HEPA vacuum or shop vac improves dust control. Some professionals also use an air purifier to reduce airborne dust during the cleaning process.
Working in sections helps maintain consistency, and repeating the cleaning steps ensures a more reliable result.
Getting the finish right starts here.
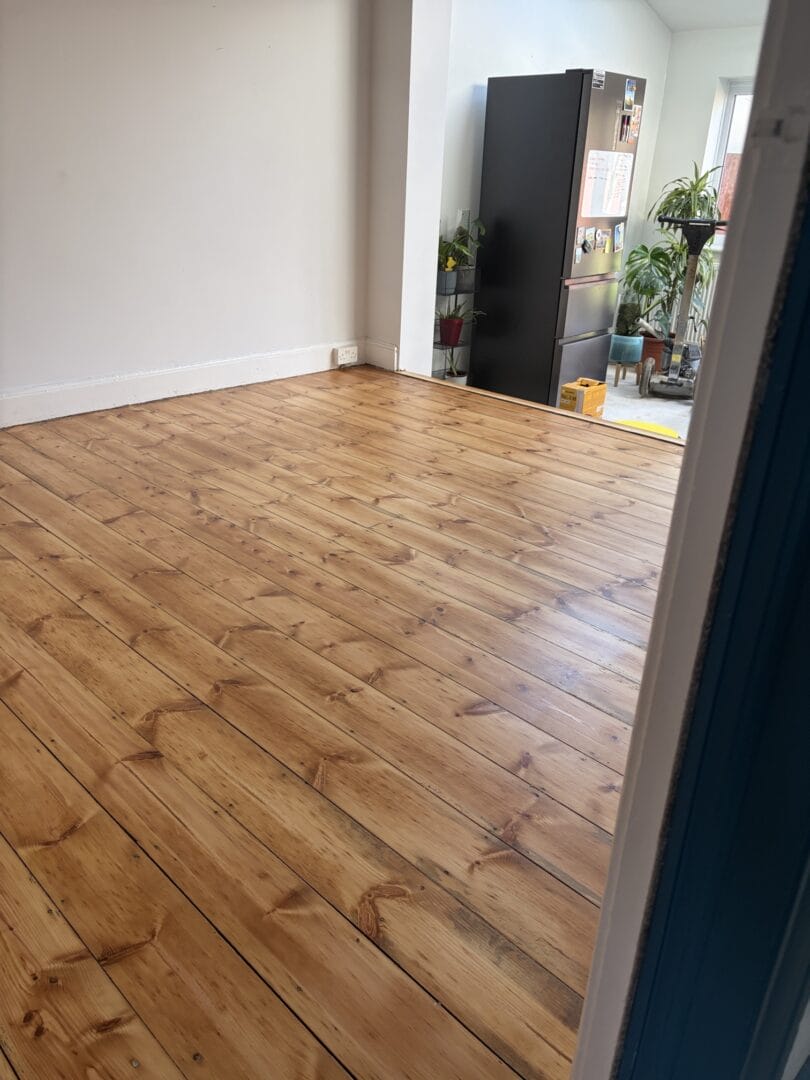
Cleaning wood floors after sanding is not just a final step. It directly affects how the finish looks, feels, and lasts.
Removing dust properly allows the floor finish to bond evenly and brings out the natural beauty of the wood.
If you are preparing freshly sanded floors and want a second opinion before applying the first coat, we are here when you are ready.
FAQs
Can I use water to clean sanded wood floors?
Yes, but only in small amounts using a damp mop. Too much water can damage the wood and cause warping.
What happens if sanding dust is not removed?
It can lead to uneven finishes, visible imperfections, and reduced durability of the floor coating.
Is vacuuming enough after sanding?
No. Vacuuming removes larger debris, but fine dust must be removed with microfiber or tack cloths.
Should I clean walls and other surfaces too?
Yes. Dust settles everywhere and can fall back onto the floor if not cleaned.
Can I use regular household cleaners?
No. Many contain harsh chemicals that can damage raw wood or interfere with finishing.